

Creating asimple bot is very easy in Azure. I introduced the bot in my previous post “Introduction to Microsoft Azure Bot Service” . In this post I will follow the official example and explain additional things on the way.
There are two ways to create bot in Azure, you can use Azure portal or if you like to play from scratch you can use Bot Builder SDK .Net/Nodejs to create bot on your local PC and deploy this on Azure.
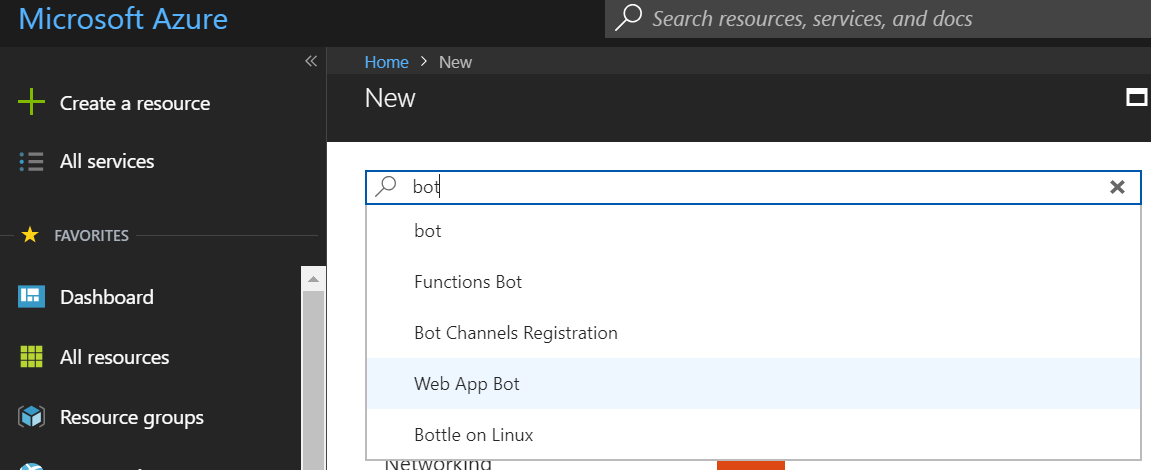
We pick first option and try to create the bot using Bot Service. This is quickest and easiest way to create a bot. If we like to extend the bot we can download the code and edit using Visual Studio or use online editor. Let’s creating a simple bot.
Step 1 –
Simply log into your Azure portal and create “Web App Bot”.

Step 2 –
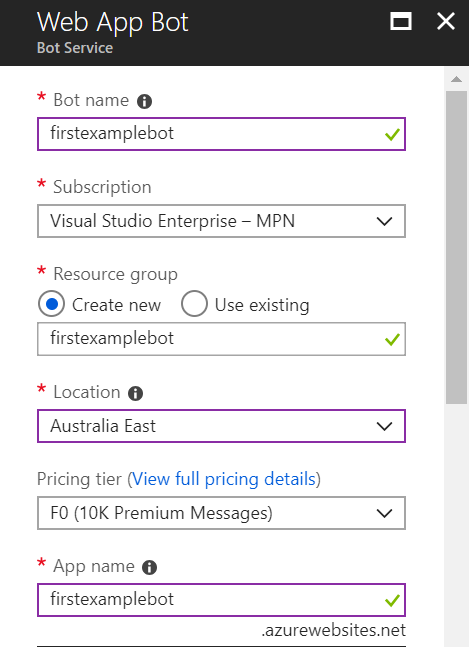
Fill the following information
| Bot name | Your bot’s display name | The display name for the bot that appears in channels and directories. This name can be changed at anytime. |
| Subscription | Your subscription | Select the Azure subscription you want to use. |
| Resource Group | myResourceGroup | You can create a new resource group or choose from an existing one. |
| Location | The default location | Select the geographic location for your resource group. Your location choice can be any location listed, though it’s often best to choose a location closest to your customer. The location cannot be changed once the bot is created. |
| Pricing tier | F0 | Select a pricing tier. You may update the pricing tier at any time. For more information, see Bot Service pricing. |
| App name | A unique name | The unique URL name of the bot. For example, if you name your bot myawesomebot, then your bot’s URL will be http://myawesomebot.azurewebsites.net. The name must use alphanumeric and underscore characters only. There is a 35 character limit to this field. The App name cannot be changed once the bot is created. |
| Bot template | Basic | Choose either C# or Node.js and select the Basictemplate for this quickstart, then click Select. The Basic template creates an echo bot. Learn more about the templates. |
| App service plan/Location | Your app service plan | Select an app service plan location. Your location choice can be any location listed, though it’s often best to choose a location closest to your customer. (Not available for Functions Bot.) |
| Azure Storage | Your Azure storage account | You can create a new data storage account or use an existing one. By default, the bot will use Table Storage. |
| Application Insights | On | Decide if you want to turn Application Insights On or Off. If you select On, you must also specify a regional location. Your location choice can be any location listed, though it’s often best to choose a location closest to your customer. |
| Microsoft App ID and password | Auto create App ID and password | Use this option if you need to manually enter a Microsoft App ID and password. Otherwise, a new Microsoft App ID and password will be created for you in the bot creation process.
This App Id and Password connects Web App Bot with App services and App ID can’t be changed later. |

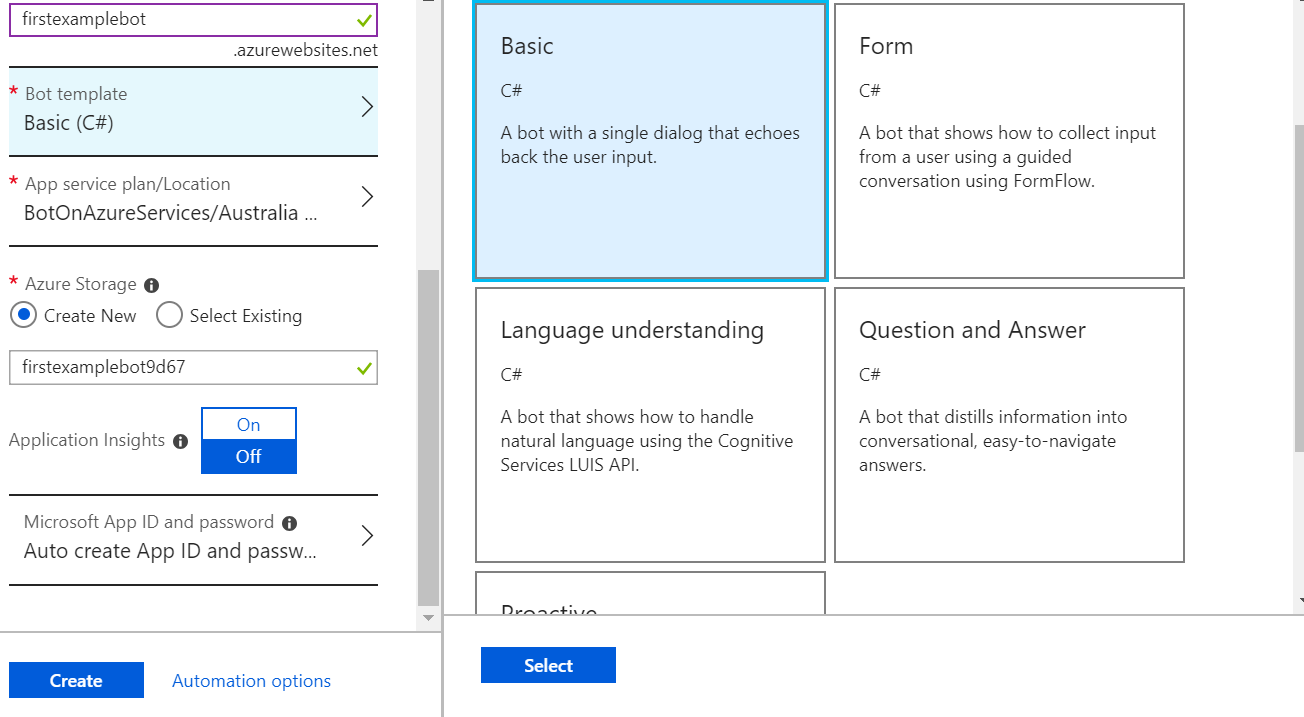

Bot Template is very important , It gives basic setup to get us going. We are choosing the basic template for this example. Click create and wait for “deployment successful” message and that’s it 🙂
Examine the Resource Group
If you go to “Resource group” (in which you created your bot) , you would see “Web App Bot” , “App Service” and “Storage Account”.
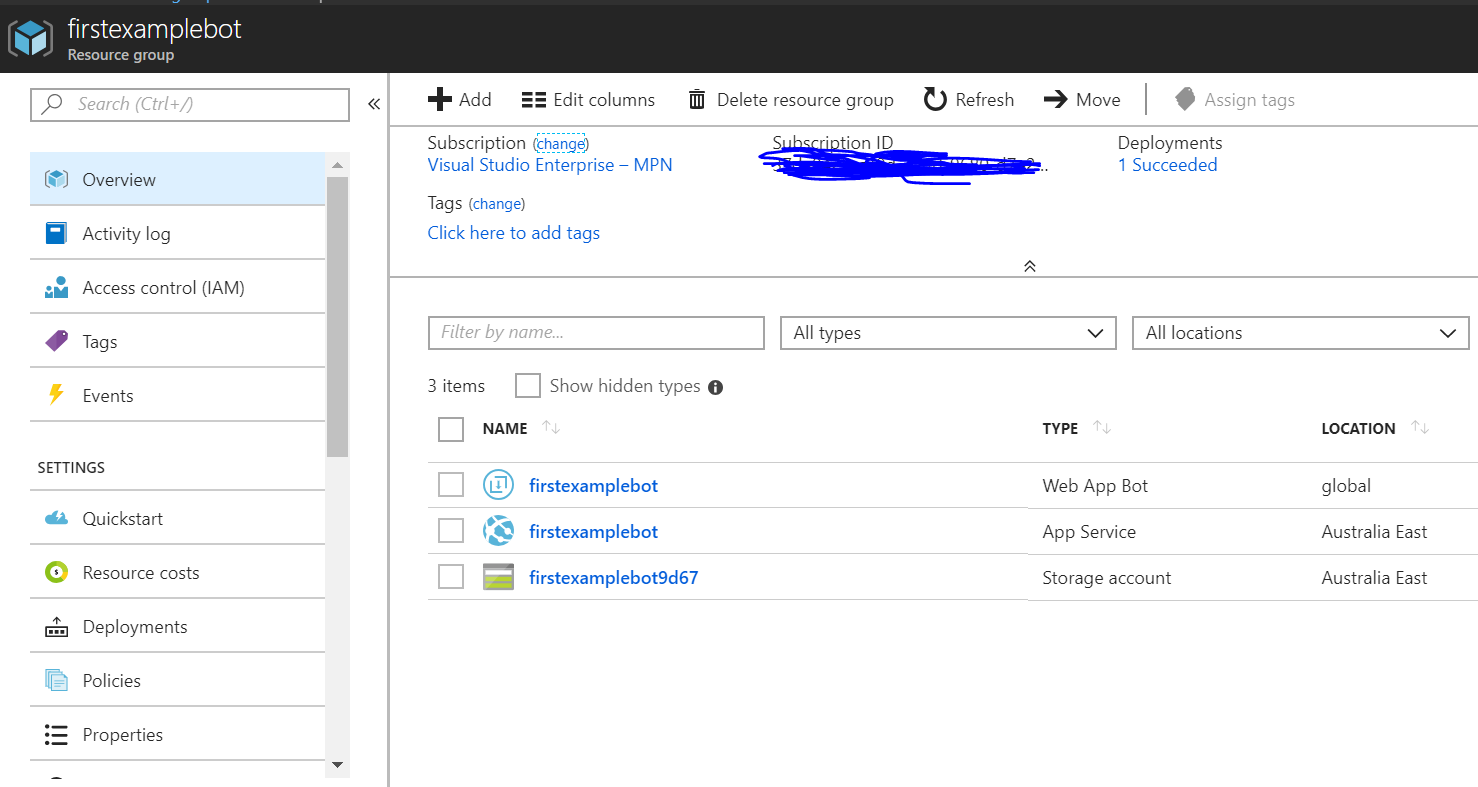

Web App Bot
“Web App Bot” in my case “firstexamplebot” is the actual Bot service that is linked to app service. “Web App Bot” is more of a bot management service which provide many out of box features e.g. setting up channels (in simple words channel is the way to connect the bot with famous services like Skype , FB messenger , slack etc so people can communicate) . Option to test the bot in portal and analytics are some of them.
App Service
The Actual code of the Bot is deployed on the app service and if we want to edit the code we have to redeploy the code in this app service. We will talk about code edit and redeployment in upcoming sessions.
Storage Account
Storage account is also created during this process. Bot service use Tables to store the bot data and logs.
Testing the service
Testing the service is really easy. Simply go to created Bot Service and on the left side you would see option “Test in Web Chat”. Simple write any message and you see Bot Service respond back.
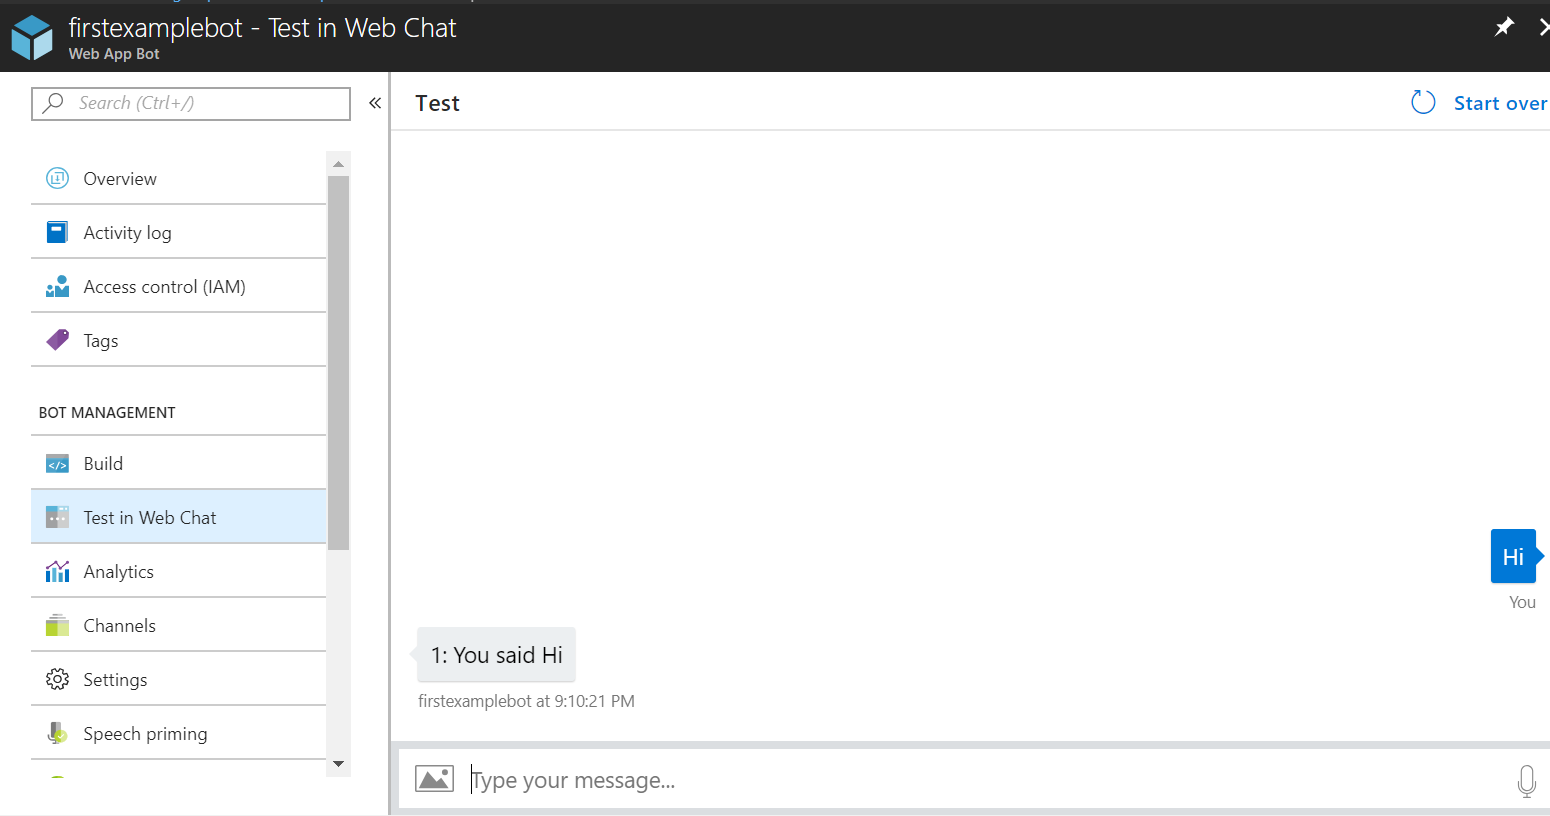

You can see in less than 5 mins we have up and running bot.
